

How to create thumbnails
There is a fast and easy way to create thumbnails in Extreme Thumbnail Generator.
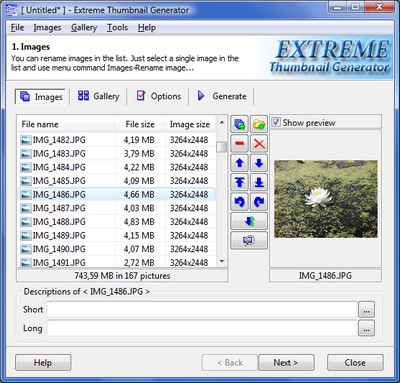
First of all - select all necessary images and add them to the new Extreme Thumbnail Generator project. You can add individual images using the  button or you can add all images from any folder (and sub-folders) using the
  button.
Now set the desired thumbnail size in pixels on the Options step, Thumbnails tab, Thumbnail size section. You can also add border (or frame) to all generated thumbnails. Simply choose the border width in pixels and border color in the Thumbnail border section.
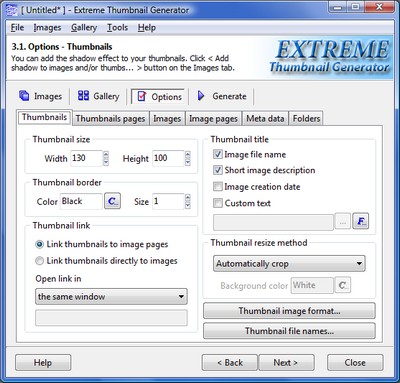
Another important option you must select is the thumbnail resize method. Simply choose it in the Thumbnail resize method section. Actual thumbnail size depends on the resize method you choose. Extreme Thumbnail Generator offers several ways to resize the original image. Please click here to read about all of them.
Now you can choose the thumbnail image format (JPEG compression level, resize filter and other options) by clicking the Thumbnail image format... button.
Finally, you can change the default thumbnail file name template by clicking the Thumbnail file names... button. Extreme Thumbnail Generator can use any image information for the thumbnail file name, including original image file name, image creation date, image size, EXIF tags and others.
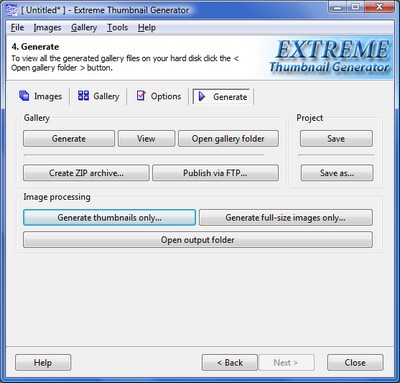
This is it. Now you can go to the Generate step and click the Generate thumbnails only... button in the Image processing section. All generated thumbnails will be saved to the folder specified on the Gallery step, in the Save gallery to field.
Extreme Thumbnail Generator also offers additional options for thumbnails creation: several image editing options including brightness and contrast adjustment and a shadow effect. You can find more information about those options in the See also section of this page.
See also
Thumbnail resize methods explained, How to add a border to the thumbnail images, Thumbnails shadow effect, Image editing options