Create HTML photo gallery for website
This tutorial shows how to create HTML photo gallery and publish it to a website step by step. No HTML, CSS, JavaScript or image processing knowledge is required. Everything is done on autopilot by Extreme Thumbnail Generator - powerful HTML photo gallery software for Microsoft Windows which comes with more than 40 photo gallery templates! You can take a look at the sample HTML photo galleries created with Extreme Thumbnail Generator.
Step 1. Download and install latest version of HTML photo gallery software using the button below. After the download is complete, run the downloaded installation package and follow simple instructions to install Extreme Thumbnail Generator on your PC.
Step 2. Start Extreme Thumbnail Generator. The application opens on the Images tab where you can choose photos for your gallery.
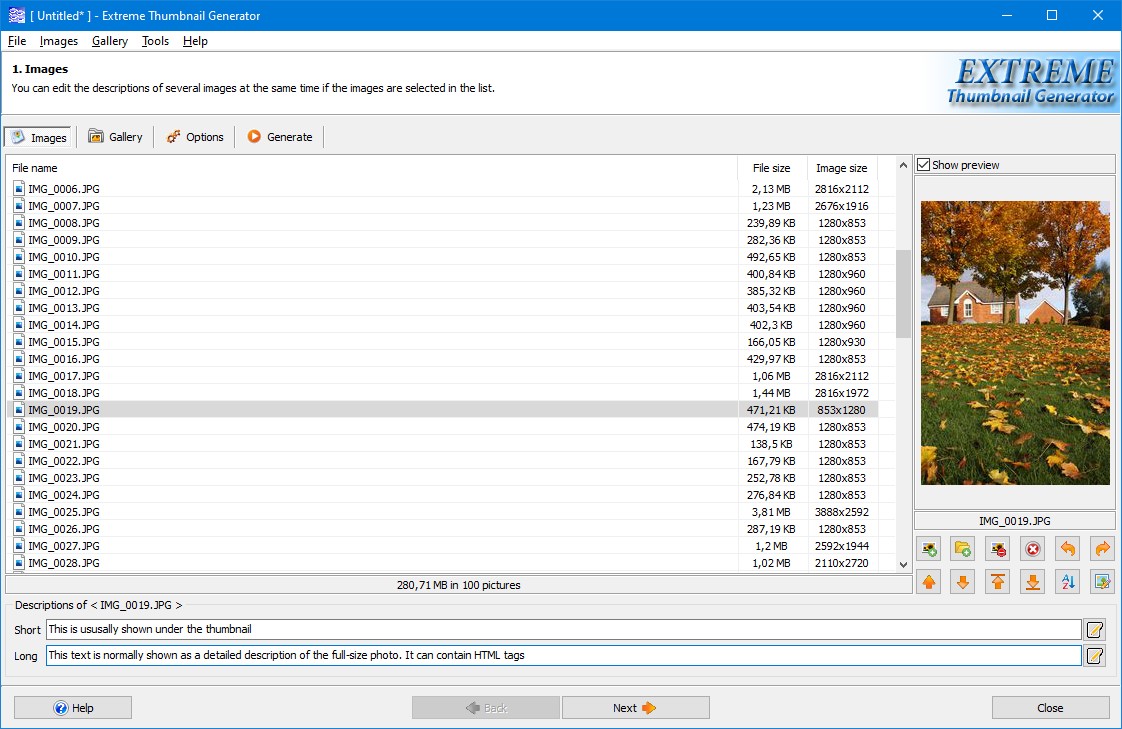
You can simply drag-and-drop photos from Windows Explorer into the Extreme Thumbnail Generator. Also you can click the ![]() button to manually select photos or the
button to manually select photos or the ![]() button to let the software automatically add all photos from a selected folder. When the photo is added, you can click its file name in the list to see a small preview. Also you can type photo descriptions if you want. Usually Short description field is used for the text that is shown under the thumbnail in the gallery and Long description field - for the text shown under the full-size image. Click Next button to proceed to the next step.
button to let the software automatically add all photos from a selected folder. When the photo is added, you can click its file name in the list to see a small preview. Also you can type photo descriptions if you want. Usually Short description field is used for the text that is shown under the thumbnail in the gallery and Long description field - for the text shown under the full-size image. Click Next button to proceed to the next step.
Tip: you can select several photos in the list using Shift or Ctrl key. Now the description you type will be applied to all selected photos.
Step 3. Now you can select a photo gallery template. Just click on any template name to see a small preview of your HTML photo gallery.

This step also allows you to enter photo gallery title and select folder on your PC where all generated gallery files will be saved. Now you can click Next button to open the Options page where all gallery settings can be adjusted. You can safely skip this page for your first gallery and click the Next button again to go to the Generate page. Now click the Generate button in the Gallery section to let Extreme Thumbnail Generator create HTML photo gallery for you. Once the gallery generation process is finished you can click the View button to open the gallery in your default web browser or the Open gallery folder button to view all generated files in Windows Explorer.

Step 4. Now it's time to upload the new gallery to website. Extreme Thumbnail Generator has a built-in FTP uploader which supports multiple FTP profiles making it easy to upload a single photo gallery to any number of websites. Simply click the Publish via FTP... button to open the built-in uploader.
Alternatively, you can use any third-party FTP software you like to upload all gallery files to the website. Just make sure you upload all files and sub-folders generated by Extreme Thumbnail Generator into a separate folder of the website. It's important: each gallery must be uploaded into its own folder on the website.
Step 5. The only thing left to do now is to embed the uploaded photo gallery into website. There are 2 ways to embed HTML photo gallery created with Extreme Thumbnail Generator into a website:
Create a link to the gallery from any existing page on the website.
Creating a link to the gallery from existing web page requires HTML code modification. So you have to open the page where you want to place a link to the gallery in your favorite web page editor and add the following code:
<a href="/gallery1/index.html">My first gallery</a>
anywhere between <body> and </body> tags. In the above example "My first gallery" is the clickable text which appears on the page, so you can enter a gallery title instead of this text. Also we assume that you uploaded the gallery into a folder called "gallery1". If you uploaded the photo gallery into folder with different name - then you must specify that folder name instead of "gallery1".
Embed the gallery into any existing web page using <iframe ...> HTML tag.
Embedding a gallery into existing page also requires HTML code modification, so open the page where you want to place your gallery in your favorite HTML editor and add the following HTML code anywhere between <body> and </body> tags:
<iframe src="/gallery1/index.html">
You can easily adjust the size of the gallery frame using the width and height attributes of the <iframe ...> tag.
This is it. Your HTML photo gallery is created, uploaded and embedded into a website in minutes. So download HTML photo gallery software and try it yourself.